Mounting Linux File Storage on Windows and MacOS Systems
Attention: If you experience permission issues when writing files to your Linux directory, change the server from one of the fs(0-2).eecs.utk.edu systems to samba.eecs.utk.edu. This will decrease speed but increase compatibility. eecs-ithelp@utk.edu
Many EECS users wish to be able to access the Linux file storage (Linux home directory) and Linux research directories as shared drives from Windows and MacOS systems. On all EECS Windows desktops located in Min Kao, users' Linux home directories are automatically mounted as the L: shared drive by a log-in script:

Manually mounting EECS Linux Home Directories
If your L: drive is not automatically connected, e.g. when using a Mac computer, a laptop, or a system outside of Min Kao, you can manually add your EECS Linux home directory to your computer.
- If you are currently off-campus (outside the UT network), you will first have to connect to the UT Virtual Private Network (VPN). This is only required from off-campus connections. Skip this step if you are on campus. Please visit Virtual Private Network (VPN) User Guide for information on how to set up the UT VPN.
- Determine which EECS server stores your Linux home area and figure out the proper folder name. You can use either of the methods below:
- Log into any EECS Linux system and run the command
mount | grep $USERNAME | cut -d “:” -f1. You will receive a result similar to this:jruser:hydra9 ~> mount | grep $USERNAME | cut -d ":" -f 1 fs1.eecs.utk.edu
Windows: The proper folder name is:
\\server\netidwhereserveris the server that houses your Linux home directory andnetidis your UTK NetID. For example:\\fs1.eecs.utk.edu\jruser.
MacOS: The server string issmb://servername/netid. For example:smb://fs1.eecs.utk.edu/jruser. - You can also use the form below to determine the proper network drive server and connection strings. Please note that this will only work if you are viewing this page from within the EECS network.
- Windows: Map a network drive to the folder determined above, i.e.
\\server\netid. In Explorer, select “This PC” then from the “Computer” menu pick Map network drive.
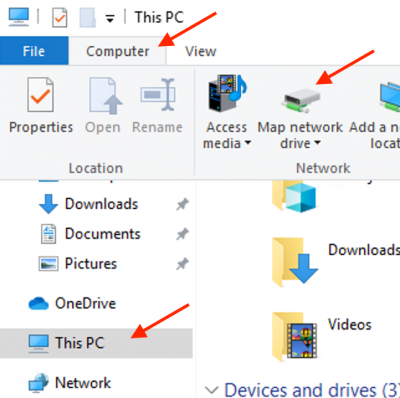
You will likely have to select “Connect using different credentials”. UseUTK\netidas your user name, e.g.UTK\jruser. - MacOS: Use “Connect to Server” from the Finder's Go menu (or press Command+K).
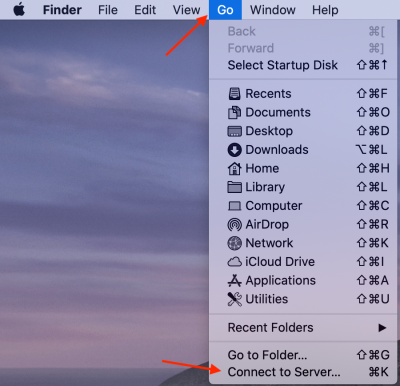
Connect using the smb string, i.e.smb://servername/netid.


Manually Mounting Your Webhome Directory
EECS file servers also provide a special “webhome” network share that automatically connects to the webhome directory in your Linux home area. By connecting to this share, you can upload files for distribution on the WWW. Permissions should automatically be set to allow the web server to access those files. Please see above for the appropriate server. The connection procedure is the same as for home directories except the connection string will use “webhome” instead of your NetID, e.g. \\server\webhome.
Manually Mounting EECS Research or Storage Areas
If you currently have access to a Linux research or storage area (i.e. a directory beginning with /research or /storage, you can also connect those to a network drive in either Windows or MacOS. The process is the same as above with only the folder string being different.
- Determine the server of the directory to which you wish to connect. Log into an EECS Linux system and type:
cd /research/directory ; mount | grep directory. Substitute the proper directory name and use/storagefor storage areas. You will receive a result similar to this:jruser:hydra4 ~> cd /research/xlab ; mount | grep xlab fs0.eecs.utk.edu:/export/research/xlab on /research/xlab type nfs4 (rw,nosuid,nodev,relatime,vers=4.1,rsize=1048576,wsize=1048576,namlen=255,soft,proto=tcp,timeo=600,retrans=2,sec=sys,clientaddr=160.36.56.12,local_lock=none,addr=160.36.127.183)
The server name is the part before the colon, e.g.
fs0.eecs.utk.edu. - Construct the proper folder string:
- Windows: Either
//server/research/directory(e.g.//fs0.eecs.utk.edu/research/xlab) or//server/storage/directory(e.g.//fs0.eecs.utk.edu/storage/xlab). - MacOS: Either
smb://server/research/directory(e.g.smb://fs0.eecs.utk.edu/research/xlab) orsmb://server/storage/directory(e.g.smb://fs0.eecs.utk.edu/storage/xlab).
\\samba.eecs.utk.edu\netid instead of the server determined above. It will provide slower, but more compatible, access.Using SSHFS
As an alternative to SMB networking, you can also mount a network drive using the SSHFS subsystem. This works on both Windows and MacOS, but requires additional software.
Windows (SSHFS-Win)
SSHFS-Win and VPN
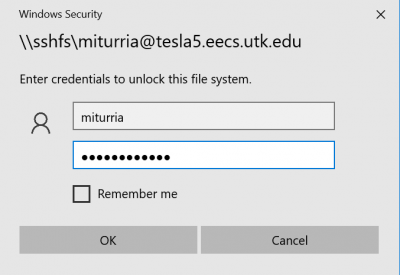
SSHFS on Windows does not support DUO authentication. You will need to be connected to the UTK VPN, even when connecting from on-campus.- Be sure to you are connected to the UTK VPN.
- Enter your normal UTK password:


MacOS (MacFuse/SSHFS)
- Download and install both MacFuse and SSHFS (in that order) from: https://osxfuse.github.io/
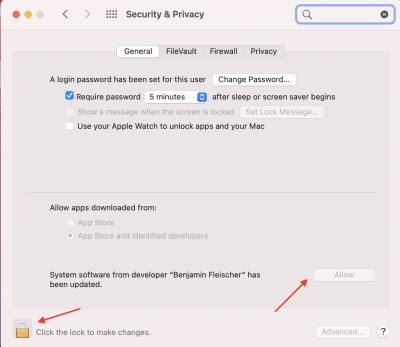
- After installation you will need to authorize the system extension and then reboot your computer. Open your System Preferences and go to Security and Privacy.
- Click the Lock to make changes
- Allow the extension
- Reboot your system
If you fail to do this step, you will receive the following error message the first time you try to connect to an SSHFS file system:

- Make a folder where you'd like to mount your EECS files. In our example we will use a directory called
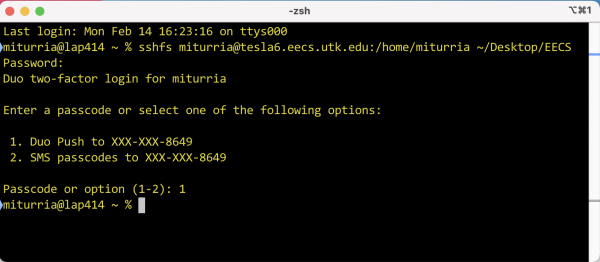
EECSon the Desktop. - Open the Terminal application and enter a command of the following format:
sshfs netid@host:/home/netid directory
Wherenetidis your UTK NetID,hostis the full domain name of one of the departmental Linux lab systems (e.g. one of the Tesla or Hydra lab computers), anddirectoryis the path to the folder you created in step 3. For example:
sshfs miturria@tesla6.eecs.utk.edu/home/miturria ~/Desktop/EECS
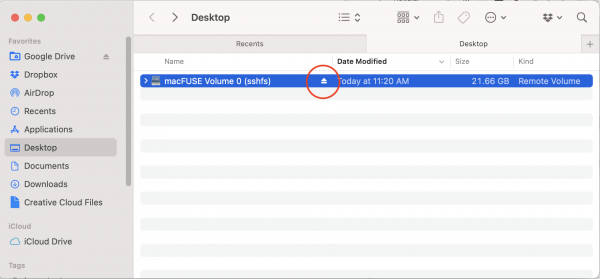
- You will now see that the directory has changed its name to
macFUSE Volume 0 (sshfs). To disconnect, select the eject logo next to the directory name:


More Information
For general information on how to connect to a network drive, please see:
- Windows:
- MacOS: