Windows Remote Desktop and File Transfer
This page covers remotely connecting to your Windows EECS desktops with options for transferring files.
VPN
If you are off campus, you will first need to connect to the UTK VPN before you can connect to your desktop. OIT has a a software download and instructions for setting up the VPN available here.
Remote Desktop from Windows to Windows
Below are instructions for remotely logging in to a EECS Windows computer from your own Windows computer.
Connecting Checklist
If you have not yet setup the VPN and remote desktop connection, follow these instructions to set this up. If you have already set up the VPN, you can skip to the remote desktop instructions below.
Summary
Once you have followed the instructions below, the process for connecting to your desktop will be:
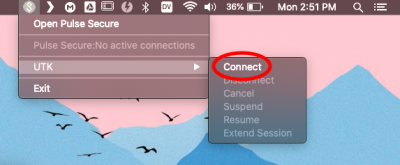
- Connect to the UTK VPN using Ivanti Secure Access.

- Connect to your desktop using the saved connection desktop shortcut.
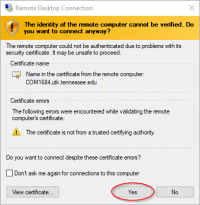
- Click Yes in the window that appears.
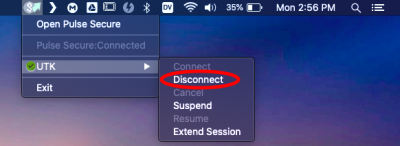
- When finished, disconnect from the UTK VPN using Ivanti Secure Access.


Setting Up Remote Desktop
For modern versions of Windows, a remote desktop client called Remote Desktop Connection is available in the Start Menu. You can use this to connect to your desktop or save connection settings. Below are instructions:
NOTE: You must be connected to the UTK VPN if you are off-campus.
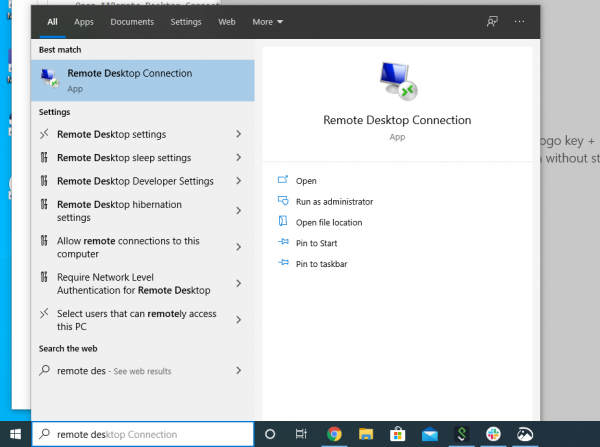
- Open Remote Desktop Connection from the Start Menu.
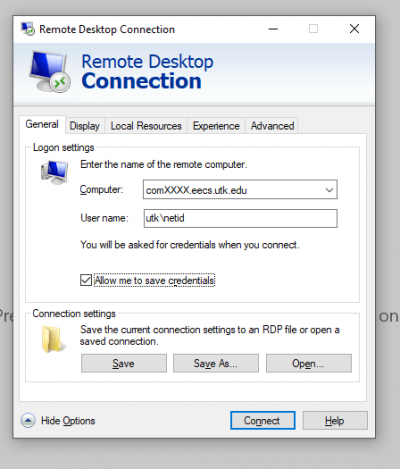
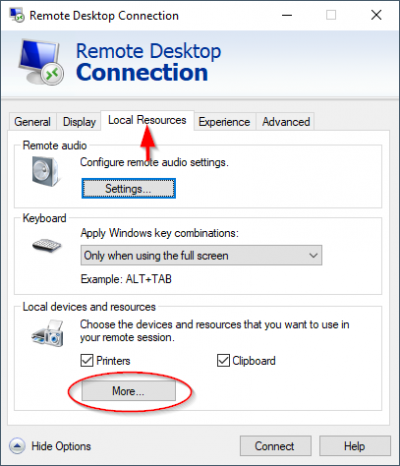
- Click Show Options and enter your desktop name (e.g., COMXXXX.eecs.utk.edu, STAFFXX.eecs.utk.edu) in the Computer field and utk\netid in the User name field. It is important to add the full domain name (in our case
eecs.utk.eduto the computer name.)
- If you want to transfer files between your hard drive and your EECS desktop…
- Open the Local Resources tab and select More… under Local Devices and Resources.
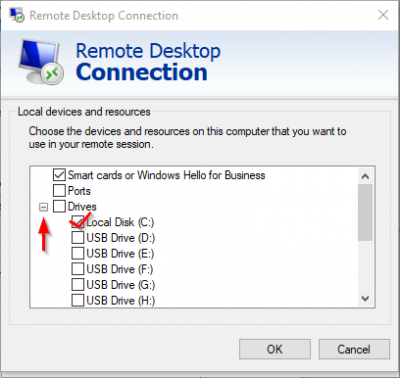
- Expand Drives and select your drive.
- If you wish to save the connection settings, return to the General tab and select Save As….
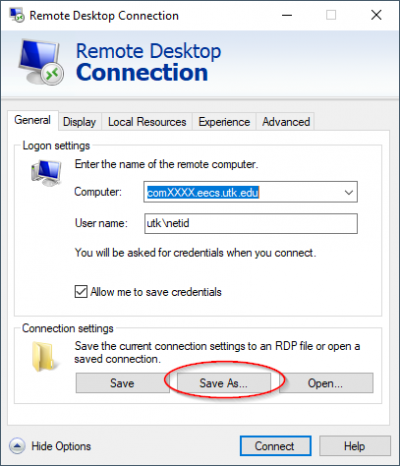
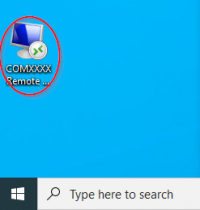
If you save your connection settings, you can simply double-click on the file to connect to your desktop again at a future time.
Remote Desktop from MacOS to Windows
Below are instructions for remotely logging in to a EECS Windows computer from your own MacOS computer.
Connecting Checklist
If you have not yet setup the VPN and remote desktop connection, follow these instructions to set this up. If you have already set up the VPN, you can skip to the remote desktop instructions below.
Summary
Once you have followed the instructions below, the process for connecting to your desktop will be:
- Connect to the UTK VPN using Ivanti Secure Access.
 - Connect to your desktop using the saved connection in Microsoft Remote Desktop 10
 - When finished, disconnect from the UTK VPN using Ivanti Secure Access*.
Setting Up Remote Desktop
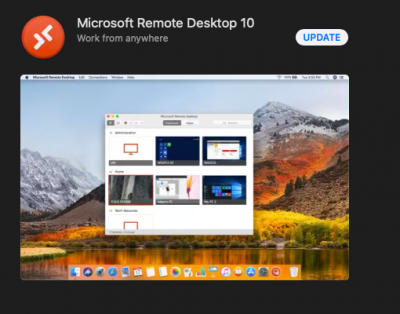
On MacOS, Microsoft has created an app in the app store called Microsoft Remote Desktop 10 that you can use to manage connections to Windows computers. Below are instructions:
- Download Microsoft Remote Desktop 10 from the App Store
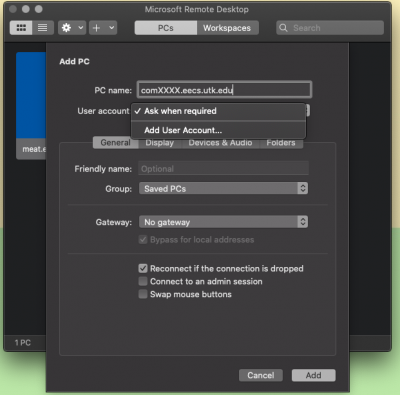
- Click the plus icon on the top of the screen and select Add PC in the dropdown
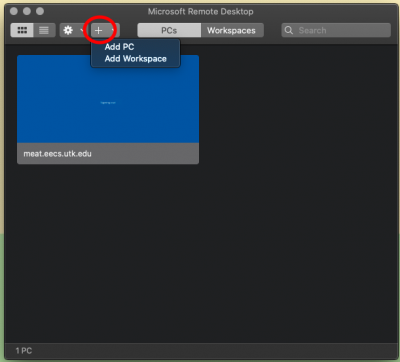
- Enter your computer name with .eecs.utk.edu in the PC Name field (e.g., comXXXX.eecs.utk.edu or staffXX.eecs.utk.edu)
- Open the User account dropdown and select Add User Account
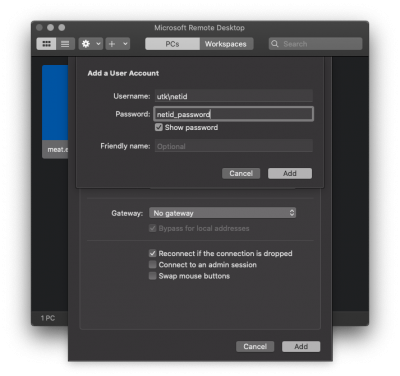
- In the window that appears, enter utk\<your netid> for the Username and your netid password, then select Add
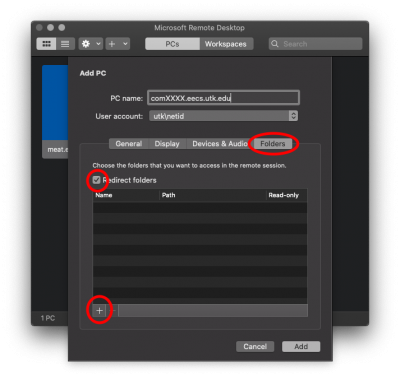
- If you want to add file sharing between your home computer and desktop…
- Open the Folders tab and check Redirect Folders
- Click the plus icon in the bottom left and select a folder you would like to share from your computer
- Select Add in the bottom right
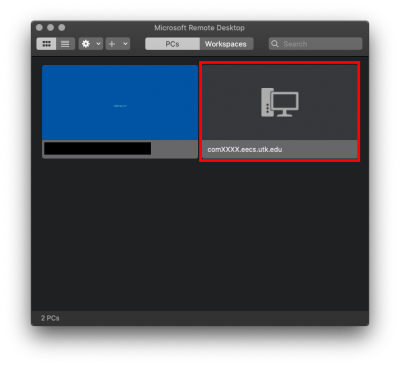
The connection should now appear in the main window of Microsoft Remote Desktop 10. You can connect by double clicking the computer. When it asks if you are sure, select Yes.
Remote Desktop from Linux to Windows
FreeRDP is a program that allows you to remote desktop from Linux. This tutorial assumes you are using X Windows System. If you are using a different Windows system, you may have to look into other tools within the FreeRDP package or other tools in general.
Connecting Checklist
If you have not yet setup the VPN and remote desktop connection, follow these instructions to set this up. If you have already set up the VPN, you can skip to the remote desktop instructions below.
Summary
Once you have followed the instructions below, the process for connecting to your desktop will be:
- Connect to the UTK VPN using Ivanti Secure Access.
- Connect to your desktop using the xfreerdp command
- When finished, disconnect from the UTK VPN using Ivanti Secure Access.
- Install FreeRDP
- It is available in most package managers as
freerdp - It is also available at https://github.com/FreeRDP/FreeRDP
- Open a terminal
- Construct a command line such as the following…
~> xfreerdp /d:utk /u:netid /dynamic-resolution +clipboard /v:comXXXX.eecs.utk.edu
# /d specifies the utk domain
# /u specifies the username
# /dynamic-resolution or /size:<width>x<height> specifies resolution. Dynamic means that it is resizable.
# +clipboard enables copying and pasting between computers
# /v specifies the computer
- When it asks if you are sure you want to connect, enter Y